Dawnlight Halls Guide
Comments
-
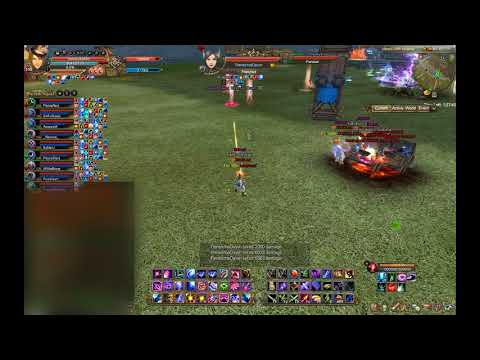
Had already added dingo's video, added yours as well, thank you!

 ☆ Pixel ♥ Heart ☆ Etherblade ☆0
 -
Just a quickie, both cleric and barb are definitely not must haves. We did full judgement mode run without either. I also think a mystic is faaar more valuable than a cleric.
Couple tips for the 2nd part of the final boss (the part with the deathwards):
1. Let the boss before that part squadwipe you, so you can respawn -> jump over the door, so all the DDs are completely ready at the lava path before someone digs the door and starts that phase.
2. The first run down the lava path could be used as a ''preparation run'', after killing 2 or 3 death wards someone tanky (Bob) with res scroll/mystic res can IG rush to the end and hug the door at the end. After that the whole squad kills themselves and does what i explained in tip 1. The reason this is effective is because all the adds that walk down that path spawn at the door where Bob is laying dead. He can use his mystic res/res scroll to get back up and stay there, if he hugs the door he wont die. Once the phase starts all the mobs that spawn will get aggroed on him so they won't walk down the bridge and won't knock people off. Neither of these tips are really needed in regular or deicide mode, but in Judgement Mode it was basically the key to our success.0 -
Naya can drop lv4 runes in decide mode (gotten 4 so far in 3 runs). Obilivon occurs at every 30% hp the boss loses (so at 70%, 40% and 10%) decide mode has 3 portals at 2nd phase (less than 70%) and the entire time the boss will send small little lights originating from her (looks like the oblivion lights) that 1 shot.The 2 lv3 runes is a 1 time quest.
Now a question, is there any pattern for the dice room boss?? The board is really easy but the boss is so RNG based it's insane. Been doing decide mode and every time a roll is failed the boss puts a shield on herself that's equal to its health(though that amount seems to decrease by a factor of 2/4 based on which roll phase you fail), but here's the kicker, the damage done to shield isn't affected by debufgs, in fact it doesn't even seem affect by any amount of damage, rather going down a set number (like 200 f****** hundred) per hit. My squad has literally spent over 10mins auto attacking the boss to get the sheild to go away when we failed a 3rd phase roll, am I missing something here?? Once it got so bad we ended up just reseting the boss until the rng gave us good dice spawns for the first 2 phases. Note, this was a boss that lost about 35% of its health from the dice board, not even a max health or worse, boss.
Now, 2nd question of the dice rolls, is there anyway to predict the 3 small dice that pop up? Can't even plan ahead bc the small dice themselves seem to be random and the polygon you're trying to complete is a fkin heptagon so you can't force a 100% chance roll on the first 2 phases. One time we needed a 1 on the very first stage! How the hell is that even fair?? And back to the randomness of the 3 small die, once we got up up right about 3 times in a row (needed right right up) so I hit the dice in a way where we would need up up right on the following roll, only to get right right up the very next attempt...
Please does anyone know if there some kind of pattern (or at least a way to quickly remove the boss sheild) for the small die? Otherwise it seems less time consuming to reset the boss whenever we get an impossible roll for the first 2 stages...full +12 SB, currently lv 105 105 1050 -
Just a quickie, both cleric and barb are definitely not must haves. We did full judgement mode run without either. I also think a mystic is faaar more valuable than a cleric.
Couple tips for the 2nd part of the final boss (the part with the deathwards):
1. Let the boss before that part squadwipe you, so you can respawn -> jump over the door, so all the DDs are completely ready at the lava path before someone digs the door and starts that phase.
2. The first run down the lava path could be used as a ''preparation run'', after killing 2 or 3 death wards someone tanky (Bob) with res scroll/mystic res can IG rush to the end and hug the door at the end. After that the whole squad kills themselves and does what i explained in tip 1. The reason this is effective is because all the adds that walk down that path spawn at the door where Bob is laying dead. He can use his mystic res/res scroll to get back up and stay there, if he hugs the door he wont die. Once the phase starts all the mobs that spawn will get aggroed on him so they won't walk down the bridge and won't knock people off. Neither of these tips are really needed in regular or deicide mode, but in Judgement Mode it was basically the key to our success.
The reason I put cleric and barb as must-haves was because the squads I've run with weren't super OP, so it was said from the perspective of an average squad. Figured things would be less messy with a barb since they have the most aggro control. But I updated my post and specified they are optional. Added your tip as well, thanks for info! ☆ Pixel ♥ Heart ☆ Etherblade ☆0
 -
forbiddenwords wrote: »
The reason I put cleric and barb as must-haves was because the squads I've run with weren't super OP, so it was said from the perspective of an average squad. Figured things would be less messy with a barb since they have the most aggro control. But I updated my post and specified they are optional. Added your tip as well, thanks for info![/color]
I havent had a barb single run I`ve done DH so far. Least in normal mode the cone AoE on fire boss is is on such a long timer you can easily handle it with different immunities w/o much trouble. I`d say healer class isnt mandatory either, helps a ton but I wouldnt call it mandatory. And this is for your "Average" squads. Normal mode is a lot easier than UP imo, its just the fact the instance is new and WC squads on Et are generally bit challenged when it comes to this game.0 -
Another tip to squads trying to nuke the last boss, Im fairly certain that channel debuff make him cast his shield (immunity) slower, which means you are more likely to interrupt him. Generally squads these days bring an SB and their ulti will take care of that, but if you dont have SB ulti, try to use other skills that increase channel time.0
-
On Dice boss
This
Turns: the amount of turns the robot has to move across the board (nothing happens when it hits 0, so it's irrelevant)
Is related to
happy face = increases the amount of energy gained
sad face = increases the amount of energy drained
When the robot lands on a happy or sad face, you get certain amount of turns, where if u land on a + or -, it will either boost the energy gained, or boost the energy lost.
Once the turns count reach 0, there will be no more "boost"0 -
To add on to that: If you are currently in happy face mode, landing on a - sign takes away no energy. But landing on a sad face instantly changes you to sad face mode even if you had points left on happy face mode.0
-
Are there any squads actually trying to figure out the mechanics to the last boss that isn't just a straight up zerg for the rest of us plebs?Here we go again....0
-
paralleogram wrote: »Are there any squads actually trying to figure out the mechanics to the last boss that isn't just a straight up zerg for the rest of us plebs?
There is Deicide mode video on my signature, which is done with mechanics. The JDH though, havent heard of anybody managing to do it trough mechanics.0 -
We've been trying to beat Judgment mode without nuking but it's damned hard. You need enough people to kill the Soul Vessels before they do barb 1-shot cone. You need people to slow down the sacrifices so there aren't so many Soul Vessels. Which doesn't leave anyone to dd the boss. It's pretty easy on Deicide but Judgment is kind of ridiculous if your squad isn't strong enough to nuke.0
-
A couple notes to add.
For Deicide:
Bridge component before last boss:
- Mobs spawn on Deicide too that push you like the notes you have in judgement. Mobs can be CC-ed (sleep, stun, etc.)
Last boss:
- Mini oblivion orbs spawn around Natya. There are a couple safe spots. One safe spot is under her skirt (within the circle that has the skull) and another is in the blue circle.
- Soul Vessel does barb one-shot cone like the lava boss does (except mini-er). This cone can be interrupted, so earthquake, alacrity of the beast, shadowless kick, white-glyphed absorb soul, etc.
- A extra portal spawns in the back after the first oblivion.
- Deicide final boss also has chance to drop Lv 4 Glyphs but the usual rate is only 0-2 (on non-2x drops)
- Drops for Judgement and Deicide are actually relatively similar for Lv1 glyphs but you get more Lv4 glyphs from judgement
Fairy Boss:
- Need at least 2 people in each color circle when the boss drops down. I recommend just assigning 4 people to intersections that create a full covering of this requirement.
- Since the reel-in from the wyrm works in judgement, BM's can pull people back into the room using reel-in.
Haven't done Judgement non-nuke yet. Hope the tip about interrupting the Soul Vessel cone helps.
terrytini (Mystic)
- Tempest (Tideswell Server)0 -
Oh also one last note about the quests that give Lv3 glyph chests.
They're one time quests.
Completing normal for the first time will give one Lv3 glyph.
Completely deicide for the first time will give two Lv3 glyphs.
Judgement was 3 or 4, I can't remember.terrytini (Mystic)
- Tempest (Tideswell Server)0 -
We still haven't beaten Judgment non-nuke but got really close yesterday. Mystics can slow the Sacrifices with Nature's Vengeance (regular slow doesn't work). Use Ethereal glyph for 50%+ slow. Stand on the opposite side of the ritual near the wall and you can slow down two Sacrifices at once.0
-
We still haven't beaten Judgment non-nuke but got really close yesterday. Mystics can slow the Sacrifices with Nature's Vengeance (regular slow doesn't work). Use Ethereal glyph for 50%+ slow. Stand on the opposite side of the ritual near the wall and you can slow down two Sacrifices at once.
Our girl terrytini managed just that the other day - video for reference is below https://www.youtube.com/watch?v=Be_tW-4TRmQ
_______________________________________________________________
For tips and tricks, specifically on the dice boss:
Psychics can use Soul of Retaliation to block the cooldown increase (since it has small damage associated) and therefore assigning a psy to dd the side dice down might work best for most squads. Venos can achieve a similar effect with glyphed blazing barrier (I think that's the one).
My own video of DHJ is below, it's not really concise and doesn't explain much but maybe people can glean things from it. https://www.youtube.com/watch?v=Dc7SFfI5TiA&t=
0
Categories
- All Categories
- 181.9K PWI
- 699 Official Announcements
- 2 Rules of Conduct
- 264 Cabbage Patch Notes
- 61.1K General Discussion
- 1.5K Quality Corner
- 11.1K Suggestion Box
- 77.4K Archosaur City
- 3.5K Cash Shop Huddle
- 14.3K Server Symposium
- 18.1K Dungeons & Tactics
- 2K The Crafting Nook
- 4.9K Guild Banter
- 6.6K The Trading Post
- 28K Class Discussion
- 1.9K Arigora Colosseum
- 78 TW & Cross Server Battles
- 337 Nation Wars
- 8.2K Off-Topic Discussion
- 3.7K The Fanatics Forum
- 207 Screenshots and Videos
- 22.8K Support Desk


 https://www.youtube.com/watch?v=TXi45uIrOt0
 https://youtu.be/RkkWkigYd3k

